 Save
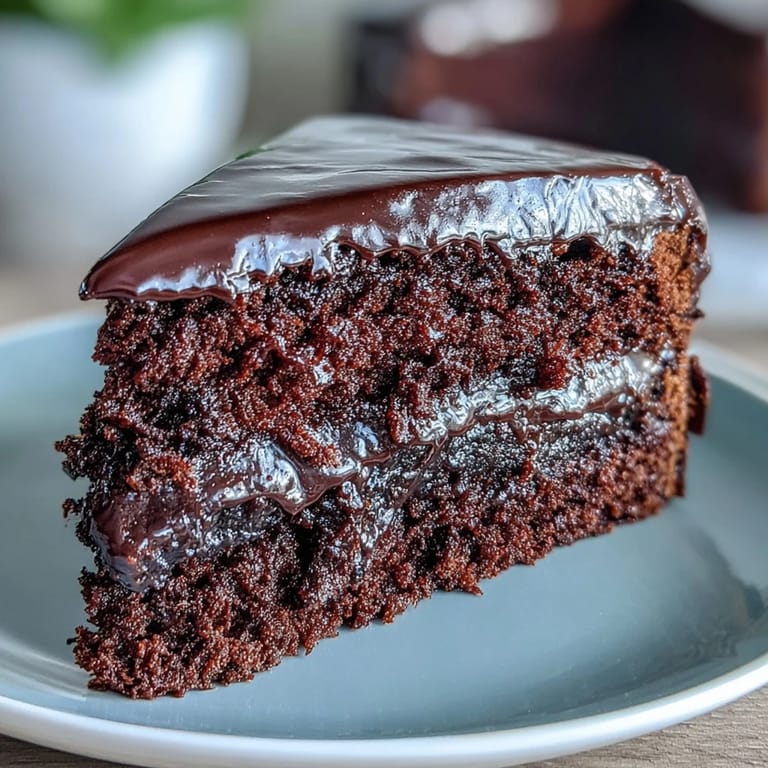
Save The kitchen smelled like a chocolate shop that autumn afternoon when I finally stopped overthinking and just made the thing. I'd been putting off baking a proper layer cake for weeks, convinced I'd mess up the timing or the icing would split. But then my neighbor mentioned her daughter's birthday was coming up, and suddenly I had a reason to stop hesitating. What came out of the oven that day wasn't just cake—it was proof that sometimes the best things happen when you simply start.
I brought this cake to a small gathering once, still warm in its tin because I'd cut the timing too close. Everyone stood around the kitchen island with forks, eating straight from the pan while the icing was still soft and glossy. No one cared that it wasn't plated beautifully. The conversation that night stretched until midnight, and I'm certain the cake had something to do with it.
Ingredients
- Unsalted butter (200 g, plus extra for greasing): Using unsalted lets you control the sweetness, and greasing the tins well prevents heartbreak when turning out the layers.
- Dark chocolate (200 g, minimum 50% cocoa solids), chopped: Don't go too high on cocoa percentage here or the cake can taste bitter, around 50 to 60% is the sweet spot.
- Light brown sugar (250 g): The molasses in brown sugar adds a deeper, almost toffee-like richness that white sugar just can't match.
- Large eggs (3): Room temperature eggs whisk up fluffier and blend more smoothly into the batter.
- Plain flour (200 g): All-purpose flour works perfectly, no need for anything fancy or self-raising here.
- Baking powder (1 ½ tsp): This gives the cake just enough lift without making it airy, you want dense and fudgy.
- Fine sea salt (¼ tsp): A small pinch sharpens the chocolate flavor and keeps everything from tasting flat.
- Cocoa powder (50 g): Sifting this is non-negotiable, lumps of cocoa powder in baked cake are grim.
- Whole milk (150 ml): The fat in whole milk makes the crumb tender, don't swap it for skim unless you want a drier cake.
- Vanilla extract (1 tsp): Real vanilla extract, not essence, rounds out the chocolate without competing with it.
- Dark chocolate for icing (150 g), chopped: Use the same quality you used in the cake for consistency in flavor.
- Unsalted butter for icing (100 g): This makes the icing spreadable and silky, and it sets with a lovely matte finish.
- Icing sugar (200 g), sifted: Sifting prevents gritty icing, which ruins the whole experience.
- Whole milk for icing (3 tbsp): Adjust by the spoonful to get the exact consistency you need, it should be thick but pourable.
Tired of Takeout? 🥡
Get 10 meals you can make faster than delivery arrives. Seriously.
One email. No spam. Unsubscribe anytime.
Instructions
- Preheat and Prepare:
- Set your oven to 180°C (160°C fan) or 350°F and grease two 20 cm round tins generously, then line the bottoms with baking paper. This step matters more than you think, I've had cakes stick despite greasing, so do both.
- Melt the Chocolate and Butter:
- Place the butter and chopped dark chocolate in a heatproof bowl over a pan of barely simmering water, stirring now and then until it's smooth and glossy. Let it cool for a few minutes so it doesn't scramble the eggs later.
- Whisk the Sugar and Eggs:
- In a large bowl, whisk the sugar and eggs together until the mixture is pale, thick, and leaves a ribbon trail when you lift the whisk. This takes a good three to four minutes by hand, or two with an electric whisk.
- Combine the Chocolate:
- Stir the slightly cooled melted chocolate into the egg mixture, followed by the vanilla extract. The batter will look glossy and smell incredible at this point.
- Sift the Dry Ingredients:
- In a separate bowl, sift together the flour, baking powder, salt, and cocoa powder. Sifting aerates everything and prevents lumps, which makes folding easier.
- Fold and Combine:
- Gently fold the dry ingredients into the wet mixture in three additions, alternating with splashes of milk. Stop as soon as everything is just combined, overmixing leads to a tougher crumb.
- Divide and Bake:
- Split the batter evenly between the two prepared tins and smooth the tops with a spatula. Bake for 30 to 35 minutes, until a skewer comes out with a few moist crumbs clinging to it, not wet batter.
- Cool the Cakes:
- Let the cakes rest in their tins for 10 minutes, then turn them out onto a wire rack to cool completely. Trying to ice a warm cake is a recipe for disaster, the icing will melt and slide right off.
- Make the Icing:
- Melt the chocolate and butter together over simmering water, then remove from the heat. Gradually beat in the sifted icing sugar and milk until the icing is smooth, glossy, and thick enough to spread but not stiff.
- Assemble the Cake:
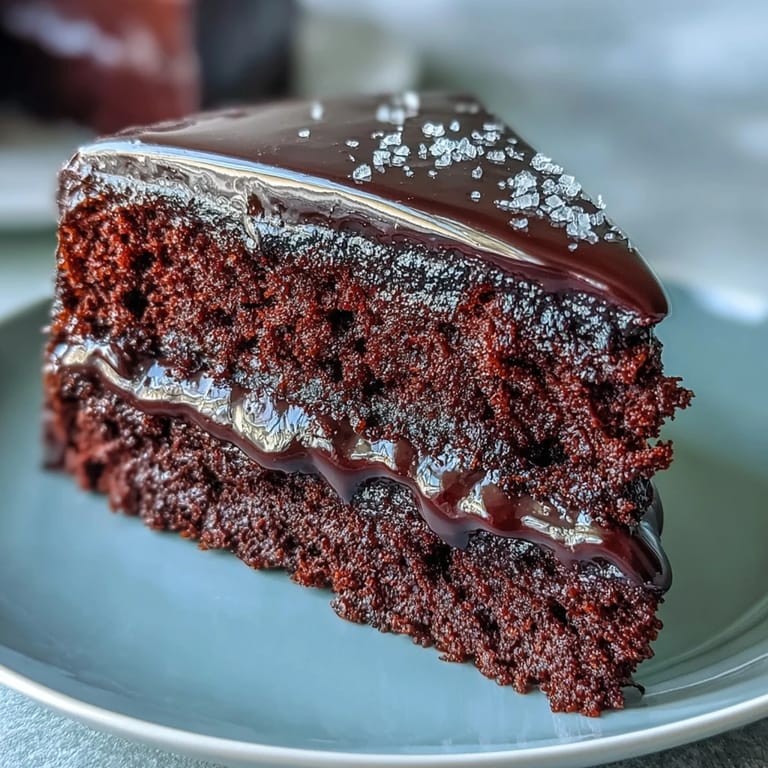
- Place one cake layer on your serving plate and spread a third of the icing over the top. Set the second layer on top, then cover the top and sides with the remaining icing, smoothing it out with a palette knife or the back of a spoon.
 Save
Save There was a rainy Sunday when I made this cake just for myself, no occasion, no guests. I ate a slice with coffee while reading by the window, and it felt like the most luxurious thing I'd done all month. Sometimes a cake doesn't need a reason, it just needs to exist.
Storing and Serving
This cake keeps beautifully in an airtight container at room temperature for up to three days, and honestly, it tastes better on day two when the flavors have melded together. If you're in a warm kitchen, you can refrigerate it, but let it come back to room temperature before serving so the icing softens again. I like to serve it with a dollop of lightly whipped cream or a handful of fresh raspberries to cut through the richness.
Customizing Your Cake
If you want to add a surprise layer, spread a thin coating of raspberry or cherry jam over the first cake layer before adding the icing, the tartness plays beautifully against the chocolate. I've also stirred a tablespoon of espresso powder into the batter for a subtle mocha twist, or folded in chopped toasted hazelnuts for texture. You can even split each layer in half horizontally and make it a four-layer showstopper if you're feeling ambitious.
What You'll Need
You don't need much beyond the basics, two 20 cm round cake tins, a couple of mixing bowls, and a whisk (electric or hand, either works). A heatproof bowl and a saucepan for melting the chocolate are essential, and a palette knife or offset spatula makes icing the cake much easier. A wire rack is helpful for cooling, but in a pinch, you can use a clean tea towel over a baking tray.
- Make sure your tins are the same size so the layers bake evenly.
- Line the bottoms with baking paper even if the tin is nonstick, it's cheap insurance.
- A skewer or cocktail stick is the best way to test for doneness, a knife can drag and give a false reading.
 Save
Save This cake has become my go-to when I want to feel like I've really made something, not just thrown ingredients together. It's forgiving, impressive, and tastes like you spent far longer on it than you did.
Common Questions
- → Can I make this cake ahead of time?
Yes, this chocolate fudge cake keeps well in an airtight container for up to 3 days, making it perfect for advance preparation for celebrations or gatherings.
- → What type of chocolate works best for this cake?
Use dark chocolate with minimum 50% cocoa solids for both the cake batter and icing. This ensures a rich, deep chocolate flavor and the perfect squidgy texture.
- → How do I know when the cake is properly baked?
Insert a skewer into the center of the cake—it should come out with a few moist crumbs attached. This ensures the cake stays squidgy and doesn't become dry.
- → Can I add any variations to this chocolate cake?
Absolutely! Add a layer of raspberry jam between the cakes for extra indulgence, or serve with whipped cream and fresh berries for a delightful flavor contrast.
- → What size cake tins do I need?
You'll need two 20 cm (8-inch) round cake tins, greased and lined with baking paper to prevent sticking and ensure easy removal after baking.
- → Why does the icing need to cool before spreading?
Allow the icing to cool slightly after melting so it thickens to a spreadable consistency. If too warm, it will run off the cake; if too cool, it becomes difficult to spread smoothly.