 Save
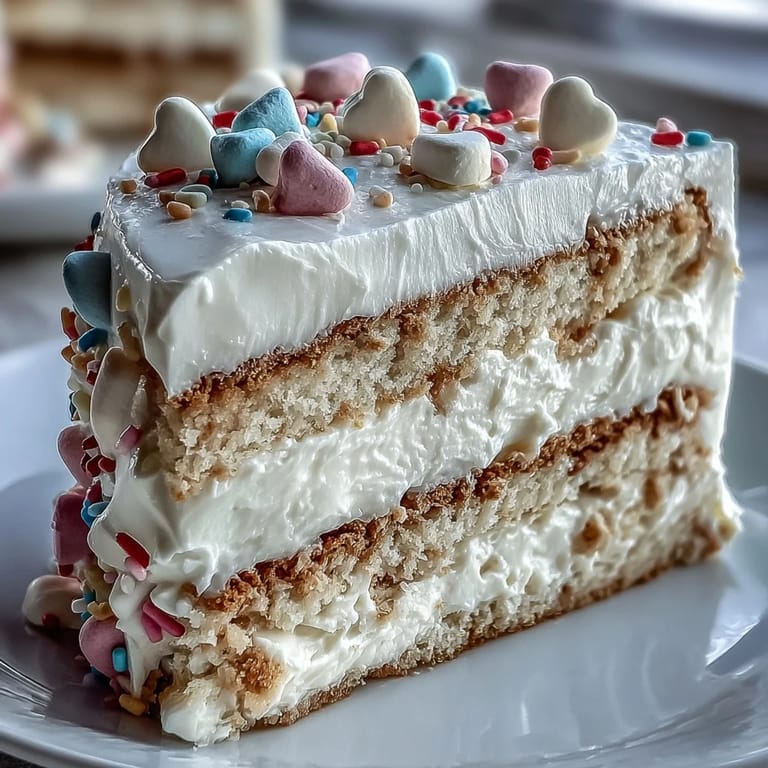
Save My niece squealed when she spotted the pastel hearts tumbling out of the bag, and I knew this dessert would be more fun to decorate than to eat. We spread them across the counter like edible confetti, picking out our favorite messages and giggling at the cheesy ones. The no-bake filling came together in minutes, soft and cloud-like, while she spun around the kitchen humming pop songs. By the time we pressed the last candy into place, the cake looked like a Valentine's card you could slice into.
I brought this to a February brunch where half the table claimed they didn't like cheesecake, yet every slice disappeared in under ten minutes. One friend admitted she'd been sneaking bites straight from the fridge before we even sat down. The pastel palette sparked a dozen photo ops, and someone joked it was too pretty to eat, then promptly reached for seconds. That morning taught me that sometimes a little whimsy wins over the fanciest technique.
Ingredients
- Graham cracker crumbs: The sweet, honeyed base holds everything together without needing an oven, and pulsing whole crackers in a food processor gives you fresher flavor than store-bought crumbs.
- Unsalted butter: Melted butter binds the crumbs into a firm, sliceable crust, and using unsalted lets you control the sweetness without any salty surprise.
- Granulated sugar (crust): Just two tablespoons add a hint of caramel sweetness that complements the buttery crunch.
- Cream cheese: Room temperature is non-negotiable here, it whips smooth and silky without lumps, and the tangy richness balances all that whipped cream.
- Powdered sugar: Sifting prevents gritty pockets and dissolves instantly into both the filling and frosting, keeping everything velvety.
- Pure vanilla extract: A teaspoon wakes up the cream cheese, and another half teaspoon in the frosting ties the layers together with warm, familiar flavor.
- Heavy whipping cream: Cold cream whips to stiff peaks faster and holds its shape longer, giving the filling its airy lift and the frosting its fluffy crown.
- Pink gel food coloring: A drop or two tints the frosting without thinning it, and gel colors are more vibrant than liquid.
- Conversation heart candies: These crunchy little messages add texture, color, and a nostalgic sugar rush that makes the whole cake smile.
- Rainbow sprinkles: A quarter cup scattered on top adds pops of brightness and a satisfying crunch in every bite.
Tired of Takeout? 🥡
Get 10 meals you can make faster than delivery arrives. Seriously.
One email. No spam. Unsubscribe anytime.
Instructions
- Build the buttery base:
- Stir the graham crumbs, melted butter, and sugar until the mixture clumps like damp sand when you squeeze it. Press it firmly into your lined springform pan, using the flat bottom of a measuring cup to create an even, compact layer, then chill for fifteen minutes so it sets up beautifully.
- Whip the cream cheese:
- Beat the softened cream cheese until it's smooth and fluffy, then add the powdered sugar and vanilla, mixing until no lumps remain. This is the moment your filling transforms from dense to dreamy.
- Fold in the clouds:
- Whip the first cup of cold heavy cream to stiff peaks in a separate chilled bowl, then gently fold it into the cream cheese mixture with a rubber spatula, turning the bowl and slicing through until no white streaks show. Over-mixing will deflate the airiness, so stop as soon as it's just combined.
- Spread and smooth:
- Spoon the filling over your chilled crust and use an offset spatula to level the top, working from the center outward. Cover with plastic wrap and refrigerate for at least four hours, or overnight if you want the firmest, cleanest slices.
- Frost with flair:
- Whip the second cup of cream with powdered sugar and vanilla until stiff, then tint it pink with one drop of gel color at a time, whipping between additions until you reach your favorite shade. Release the springform ring, transfer the cake to a plate, and spread the frosting over the top and sides in soft, swoopy waves.
- Press the hearts:
- Gently press conversation hearts into the frosting around the sides, covering it in a mosaic of pastel messages, then scatter more hearts and rainbow sprinkles across the top. Chill for thirty minutes before slicing so the frosting firms up and the candies hold their place.
 Save
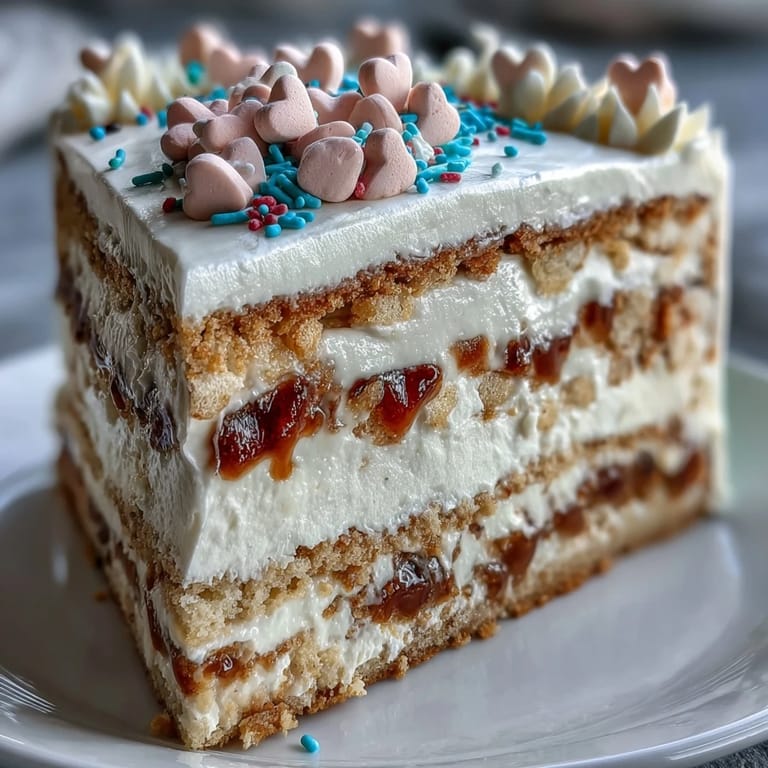
Save The first time I sliced into this cake, the pastel hearts tumbled onto the plate like a tiny avalanche, and everyone at the table laughed. We passed slices around, reading the candy messages out loud and trading our favorites like elementary school valentines. It turned dessert into a game, and suddenly the sweetness wasn't just sugar, it was the silly, lighthearted moment we all needed that evening.
Making It Your Own
Swap the graham crackers for vanilla wafers or chocolate cookies to shift the flavor in new directions, or fold a handful of crushed freeze-dried strawberries into the filling for a fruity surprise. If you're not a fan of pink, leave the frosting white or tint it lavender, mint, or even a soft peach. You can also layer the filling with a ribbon of lemon curd or berry jam for a tangy contrast that cuts through the richness.
Storing and Serving
This cake keeps beautifully in the fridge for up to three days, covered loosely with plastic wrap or a cake dome to protect the frosting. The candies will soften slightly over time, so if you're planning to serve leftovers, save the heart decorations and press them on fresh before each serving. For a firmer texture that slices like a dream, freeze the assembled cake for an hour before frosting, then let it sit at room temperature for ten minutes before cutting.
Final Touches
If you want extra flair, pipe rosettes of whipped frosting around the top edge before adding the hearts, or tuck fresh berries between the candies for pops of color and flavor. A drizzle of melted white chocolate over the finished cake adds a glossy, elegant finish that photographs beautifully. The key is to have fun with it, this dessert is as much about the creative process as it is about the creamy, crunchy, sweet reward at the end.
- Use a hot, dry knife to slice clean portions, wiping it between cuts.
- Serve with sparkling rosé or a fruity herbal tea to balance the sweetness.
- Leftover candy hearts make excellent ice cream toppers or party favors.
 Save
Save This cake proves that dessert doesn't have to be complicated to feel special, just a little whimsy and a lot of heart. Every slice is a sweet reminder that the best recipes are the ones you share with people who make you smile.
Common Questions
- → Can I make this dessert ahead of time?
Yes, the cheesecake filling actually benefits from chilling overnight. Simply prepare through step 5, cover tightly, and refrigerate for up to 24 hours. Add the whipped frosting and candy decoration no more than 4-6 hours before serving to prevent the hearts from becoming too soft.
- → What can I substitute for conversation hearts?
Try other Valentine-themed candies like red hots, pink and white M&M's, or crushed peppermint. For non-candy options, fresh berries, edible flowers, or heart-shaped sprinkles work beautifully. Just ensure any substitution provides that satisfying crunch contrast to the creamy filling.
- → Why did my whipped cream collapse when folding?
The cream cheese mixture may have been too warm, or the whipped cream wasn't whipped to stiff peaks. Always chill your bowl and beaters before whipping cream, and ensure your cream cheese is truly softened but not warm. Fold gently with a spatula using sweeping motions rather than stirring.
- → Can I freeze this dessert?
The unfilled cheesecake layer freezes exceptionally well for up to 2 months. Wrap the springform pan tightly with plastic wrap and foil before freezing. Thaw overnight in the refrigerator before adding whipped frosting and decorations. Once decorated, freezing is not recommended due to the candy topping.
- → How do I get the crust to hold together?
The key is mixing melted butter thoroughly into the crumbs until the texture resembles wet sand. Press firmly into the pan using the bottom of a measuring cup to create an even, compact layer. The 15-minute chilling step is essential—don't skip it or the crust may crumble when sliced.